
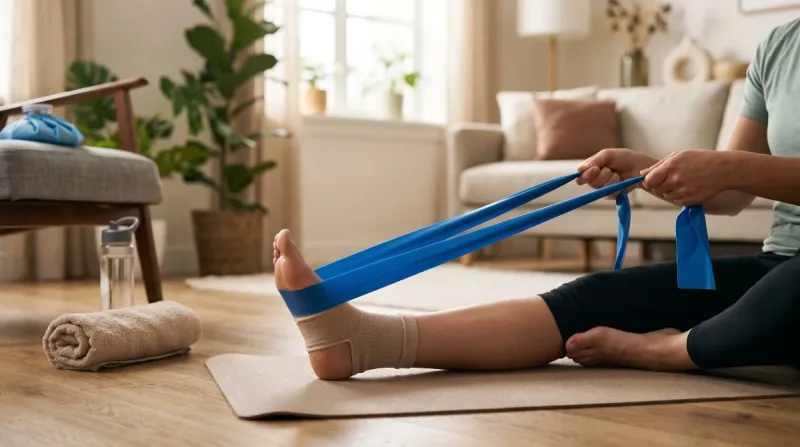
A mild ankle sprain—most commonly an inversion injury where the foot rolls inward—stretches and creates micro-tears in the outer stabilizing ligaments, particularly the anterior talofibular ligament (ATFL). While resting during the initial acute stage is necessary, keeping the joint completely immobile for too long leads to chronic stiffness, tendon shortening, weakened calves, and a higher risk of recurrent rolling.
The best approach using easy physical therapy exercises for mild ankle sprain recovery at home involves a structured, progressive sequence: starting with non-weight-bearing range of motion, advancing to isometric strengthening, and progressing to balance (proprioception) retraining. Activating the ankle joint early with controlled, pain-free movements encourages healthy collagen alignment, speeds up lymphatic fluid drainage, and restores joint stability.
Always wait until acute, throbbing pain and major swelling begin to settle (typically 48 to 72 hours post-injury) before starting these rehabilitative movements.
The 3 Phases of Ankle Rehabilitation
Ankle healing occurs in distinct tissue repair stages. Rushing into standing balance work when the ligament is still acutely inflamed can delay recovery:
-
Phase 1: Early Mobility and Edema Reduction (Days 2 to 5): The focus is on gentle, non-weight-bearing range of motion to circulate synovial fluid and pump away inflammatory swelling without straining the injured ligament.
-
Phase 2: Muscle Strengthening and Tendon Loading (Days 5 to 14): Once you can walk with minimal discomfort, introduce isometric holds and light resistance band exercises to strengthen the peroneal muscles along the outside of the lower leg.
-
Phase 3: Balance and Proprioception Retraining (Weeks 2 to 4): Sprains damage the micro-receptors inside ligaments that tell your brain where your foot is in space. Single-leg balance and functional movements retrain these sensors to protect against future sprains.
Phase 1: Gentle Range-of-Motion Exercises (Non-Weight-Bearing)
Perform these movements while seated comfortably on a chair or lying on a bed with your leg elevated.
-
The Ankle Alphabet: Sit upright and lift your injured foot slightly off the floor. Pretend your big toe is a pen and slowly trace every capital letter of the alphabet from A to Z in the air. This guides the ankle smoothly through all planes of motion—dorsiflexion, plantarflexion, inversion, and eversion—without placing direct body weight on the healing ligaments. Perform 1 to 2 complete alphabets twice daily.
-
Ankle Pumps (Up and Down): Sit with your leg extended straight out in front of you. Slowly pull your toes upward toward your shin (dorsiflexion) until you feel a gentle stretch in your calf. Hold for 3 seconds, then point your toes smoothly away from you (plantarflexion) like pressing a gas pedal. Complete 15 to 20 slow, fluid repetitions.
-
Ankle Circles: Lift your foot and slowly rotate the ankle in wide, smooth clockwise circles. Complete 10 circles, pause for 5 seconds, and then reverse direction for 10 counter-clockwise circles. If you hit a tight angle, move gently through it without forcing through sharp pain.
-
Towel Foot Curls: Sit on a sturdy chair with your bare feet resting flat on a smooth tile or wood floor. Place a light hand towel flat under your injured foot. Using only your toes, scrunch and pull the towel toward your heel. Once you have bunched the entire towel, use your toes to push it back outward. Repeat 3 to 5 times to rebuild intrinsic foot muscle control.
Phase 2: Strengthening and Loading Exercises
Once basic swelling has subsided and you can bear weight on your foot without sharp pain, begin strengthening the stabilizing muscles of your lower leg.
-
Seated Towel Calf Stretch: Sit on the floor or a firm bed with your legs extended straight ahead. Loop a rolled towel, yoga strap, or belt around the ball of your injured foot. Keeping your knee straight, gently pull the towel toward your chest with both hands until you feel a deep, comfortable stretch along the back of your calf and Achilles tendon. Hold statically for 20 to 30 seconds without bouncing. Repeat 3 times.
-
Isometric Ankle Inversion and Eversion: Sit next to a sturdy, immovable object like a sofa base or wall. For eversion (pushing outward), place the outer edge of your injured foot against the base of the sofa. Press outward against the object as if trying to turn your foot outward, but do not let the joint actually move. Hold this isometric contraction for 5 to 6 seconds, then relax. Complete 10 repetitions. Repeat on the inside of the foot by pressing inward against an opposing surface.
-
Resistance Band Ankle 4-Way Strengthening: Anchor an elastic resistance band to a heavy table leg:
-
Dorsiflexion: Loop the band over the top of your foot and pull your toes up toward your knee against the band's tension.
-
Plantarflexion: Hold both ends of the band in your hands, loop the center around the ball of your foot, and press down against the elastic resistance.
-
Eversion: Wrap the band to provide resistance as you sweep the outer edge of your foot outward and upward. This builds the peroneus longus and brevis muscles—the primary guardians against rolling your ankle. Perform 2 sets of 12 repetitions for each direction.
-
-
Double-Leg Heel Raises: Stand tall facing a wall or holding onto the back of a sturdy chair for balance. Place your feet hip-width apart. Slowly press through the balls of both feet to lift your heels off the ground. Rise as high as comfortable, hold for 2 seconds at the top, and take 3 slow seconds to lower back down. Complete 2 sets of 10 to 12 repetitions.
Phase 3: Balance and Proprioception Retraining
Rebuilding balance is the single most critical step in preventing chronic ankle instability. Without balance retraining, the ankle remains vulnerable to rolling again on uneven surfaces.
-
Single-Leg Standing Balance: Stand upright next to a sturdy kitchen counter or wall for safety. Lift your uninjured foot off the ground so you are standing entirely on your recovering leg. Keep a micro-bend in your standing knee (do not lock it straight). Aim to balance steadily for 30 seconds without grabbing the counter. Rest for 15 seconds and repeat 3 times.
-
Single-Leg Balance with Eyes Closed: Once you can comfortably balance on one leg for 30 seconds with your eyes open, challenge your deep neurological sensors by closing your eyes. Without visual feedback, your ankle micro-muscles work twice as hard to maintain equilibrium. Aim for 10 to 20 controlled seconds.
-
Tandem Stance (Heel-to-Toe Standing): Stand tall and place the heel of your injured foot directly in front of the toes of your healthy foot, forming a straight line like walking a tightrope. Hold this narrow stance for 30 seconds. To advance, try slowly turning your head from left to right while maintaining position.
-
Single-Leg Clock Taps: Stand on your injured leg in the center of an imaginary clock face. Keep your hands on your hips and a soft bend in your standing knee. Slowly reach the toe of your opposite foot forward to tap "12 o'clock," return to center, tap to the side at "3 o'clock," return to center, and reach behind to tap "6 o'clock." Complete 5 full clock rounds.
Safe Progression Guidelines
Healing ligaments require gentle mechanical loading, but pushing through severe pain will cause setbacks. Use these guidelines to monitor your workouts:
-
The 24-Hour Pain Rule: Mild soreness (rated 1 to 3 out of 10) during or right after exercise is completely normal. However, if your ankle throbs noticeably that evening or feels significantly stiffer and more swollen the next morning, you have done too much. Drop back to the previous phase for two days.
-
Ice After Exercise: If the joint feels warm or slightly puffy after your rehabilitation routine, apply an ice pack wrapped in a thin towel for 15 minutes to control residual inflammation.
-
Footwear Matters: Perform early mobility and towel scrunches barefoot, but switch to supportive, lace-up athletic sneakers when transitioning to heel raises and standing balance drills.
When to Seek a Medical Evaluation
While grade 1 (mild) ankle sprains respond exceptionally well to home physical therapy, certain symptoms indicate a more severe grade 2 or 3 sprain, or an undetected hairline bone fracture:
-
Total inability to bear weight or take four consecutive steps immediately after the injury or the following day.
-
Severe, localized pinpoint tenderness directly over the bony protrusions of the ankle (the lateral or medial malleolus).
-
Widespread, dark purple bruising extending across the entire top of the foot and toes.
-
Persistent joint instability, feeling as though the ankle is loose, clicking out of place, or giving way during normal walking.
Medical Disclaimer: The information provided in this guide is for educational and informational purposes only and does not constitute medical advice, diagnosis, or treatment. If you experience severe swelling, visible deformity, or an inability to bear weight, consult a qualified physician or physical therapist for proper clinical evaluation.



Comments
No comments yet. Be the first to ask a question or share an update.
Leave a comment
Your mobile number is never published. Comments appear after review. Website links, email addresses and code are not allowed.